You’ve come to this page because your RAID storage device has failed and you want to know how to get your data back. You may be wondering what methods RAID recovery engineers use to recover your data. What exactly is RAID data recovery, and how does it work?
The RAID data recovery process

This article outlines the process used by recovery engineers to restore your data from a failed RAID (Redundant Array of Independent Disks) drive. You will learn about the step by step process of data recovery for common RAID types including RAID 5, RAID 1, RAID 0, RAID 6, and RAID 10.
As a RAID recovery service provider since 2011, we know the RAID recovery process inside and out. Our recovery engineers follow the highest standards and practices in the industry to efficiently and successfully return your data to you.
We know that RAID is a complex system and the RAID recovery process can leave you with many questions. Our goal is to provide a transparent, easy to understand explanation of the process you can expect when working with a RAID recovery service.
By the end of this article, you will:
- Know what to expect when you submit a case to a RAID recovery company
- Understand the step by step process of RAID recovery
- Be prepared with the next steps to take to get your data returned to you
How does RAID recovery work?
RAID drives are a standard data storage option for home users and businesses alike. The benefits of RAID’s multi-drive configuration include expanded capacity, reliability and fault tolerance compared to a single drive storage system. Despite their namesake data redundancy capabilities, many common RAID failures can leave you without access to your data.
Data redundancy means that data in most RAID levels are stored in two separate locations to create fault tolerance. This design allows for one or more drive failures to occur without data loss, depending on the RAID level.
RAID’s multi-drive setup does provide more reliability than a single drive storage system. Still, no RAID level is fail-safe and RAID’s multiple failover levels make recovering data from RAID complicated.
We’ve created a breakdown of common RAID levels and failures to help answer any questions you may have about the complex configuration of your RAID.
Now that you know how RAID works and how it can fail, let’s talk about the actual RAID recovery process.
Below you will find an outline of the initial case evaluation process used by RAID recovery engineers so you know exactly what to expect.
How to start the RAID recovery process
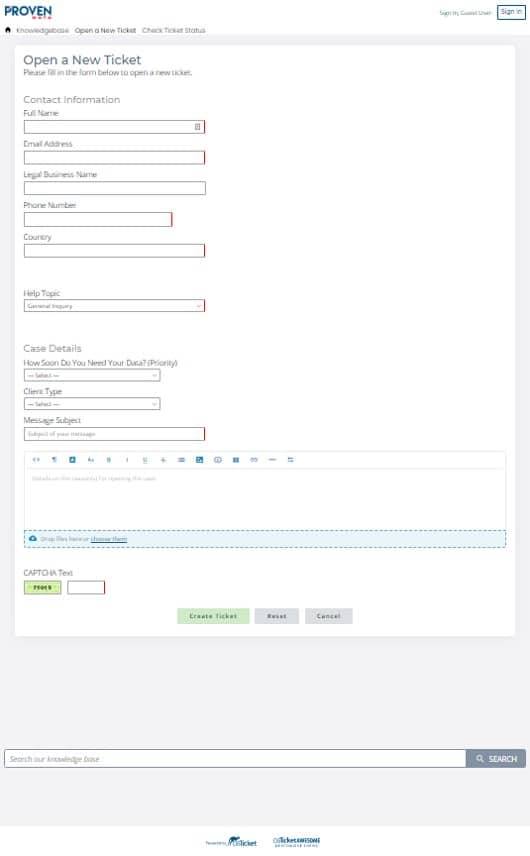
When you submit a case to a data recovery company, you will fill out a ticket with basic information on your case. A representative from the recovery service will respond to this initial information by providing you with the next steps to take to begin the RAID recovery process.
You will be advised to discontinue all usage of your failing device to prevent further damage. This is an essential first step in all data recovery cases to avoid irreversible damage and slim chances for data recovery.
Next, you will be asked to answer several questions regarding your data loss scenario. These questions are used by data recovery engineers to assess the failure, understand the difficulty of the recovery and provide you with an estimated cost and timeframe to recover your data.
Be prepared to answer questions about your RAID including:
What happened and when?
How many hard drives are in the RAID?
What is the file system (NTFS, HFS, EXT, etc.)?
What is the total storage capacity of each drive?
What is the manufacturer of the server?
What is the RAID configuration (RAID 0, 1, 5, 6, 10, etc.)?
What is the hard drive interface (SATA, SAS, SCSI, IDE, etc.)?
Have there been any previous recovery attempts?
What type of data is most important (documents, databases, email, etc.)?

After reviewing your answers, you will be provided with an estimated RAID recovery cost and a choice of evaluation types.
You will then be asked to choose an evaluation type: standard evaluation (usually 1-3 business days) or emergency evaluation (usually 3-6 hours for an additional fee). This choice will determine the level of priority a recovery engineer will give your case.
Once you accept the evaluation offer, you will be provided instructions on how to get your RAID drives to the recovery service location.
Step-by-step RAID recovery process
Now that you know what to expect when you submit your RAID for evaluation, what happens next? We’ve created a seven-step guide to the RAID recovery process to help you understand how your data gets restored and returned to you.
The methods outlined below are standard protocol for the common RAID types discussed in this article.

Step 1. Make a copy of all drives
This is a universal practice for all data recovery scenarios. Duplicating all drives provides the recovery engineer with an identical copy of all the data on your RAID.
Step 2. Run diagnostics on all drives
A data recovery engineer will conduct a diagnosis on all drives in the RAID to detect any broken drives. This process checks even functioning drives to ensure a complete picture of the damage is presented and no detail is overlooked. Any necessary repairs that the recovery engineer can conduct to allow for a more successful recovery will also be addressed.
Step 3. Analyze the metadata on each RAID drive
Once all errors have been detected and fixed as necessary, the data recovery engineer will analyze the metadata. Metadata provides information on the size, type and order of every hard drive in RAID. Metadata also shows when the most recent data was written to the drive. It is especially important in the recovery process to understand which drive has the most current data. Using the metadata, a recovery engineer will also find and exclude any stale drives (if applicable in RAID’s with multiple drives).
Step 4. Reproduce the physical RAID
To find the logical units of the array, a recovery engineer will recreate the physical disk arrangement and rebuild the data tree. This process allows the engineer to see the data structures and files that are still visible after the failure. Reproducing the physical arrangement of your RAID helps determine how much of the data is recoverable.
Typically, the larger the capacity of the storage drive, the more logical units it will have. Examining and rebuilding these units contributes to the length of time it will take for recovery.
Step 5. Use filesystem to locate data
Using the logical units discovered through reproducing the RAID structure, the recovery engineer can identify and utilize the RAID’s filesystem. A RAID filesystem is designed to map the array’s logical structure to identify your files’ locations. Uncovering the filesystem of a failed RAID is crucial to data recovery. The filesystem contains key information on the location of data that may have been damaged or lost due to the RAID failure.
If the filesystem itself is damaged, a RAID recovery engineer will conduct a raw recovery. Raw RAID recovery is only used if the recovery engineer is unable to build a file directory due to the extreme extent of the damage. The raw recovery process scans your entire array and picks up files according to their file type (jpeg, docs, etc.).
Unfortunately, if the failure is severe enough, a recovery engineer will not be able to restore your folder structure. However, your data will still be successfully returned to you in bulk folders according to file type.
Step 6. Extract and test sample files
After the RAID is recreated and the filesystem examined, a recovery engineer will extract a file and test it to see if it is functional. Since many RAID levels use data striping and data is distributed across multiple locations to provide redundancy, the data tree must be reconstructed accurately. Recovery engineers use this testing step to verify the success of the rebuild and the availability of usable data before moving forward with data extraction.
Step 7. Extract all available data from the RAID array
The final step of RAID recovery is when the recovery engineer extracts all available data from the RAID and transfers it to a healthy drive to return to you. Often a list of recovered files is delivered to you as well to make sure you know exactly what data was retrieved from your failed RAID.
These steps outline the typical RAID recovery process. Due to the complexity of RAID configurations, the recovery process varies from case to case. Variations in the recovery process are usually determined by factors including the severity and type of failure and the number of hard drives in your RAID.
How much does RAID recovery cost?
Now that you understand the standard process to restore data from common RAID configurations, how much will RAID recovery cost you? We’ve created a breakdown of RAID recovery costs to give you insight into the factors that contribute to how much you will pay to recover your data and how long RAID recovery will take.
The RAID recovery engineers at Proven Data are standing by 24/7 to answer your questions and provide the expertise you need to understand the complex RAID recovery process. We are committed to providing you with the specific recovery process you need to successfully retrieve and return your RAID data to you.
To get started with RAID recovery, open a case and talk with one of our experts today!
Need more RAID data recovery information?
Learn more about the Proven Data RAID recovery service and how our engineers can help!


