5 step process of a hard drive recovery service:
1) Image and rebuild the hard drive
2) Trace and rebuild the data tree
3) Extract and transfer data from the image of drive
4) Send file list for your review
5) Return your data to you
You’ve come to this page because your hard drive has failed. You’ve lost access to your data, panic is starting to set in, and you’re wondering if you will ever be able to get your data back. We’re here to tell you not all hope is lost. Hard drive recovery specialists are waiting to come to your aid. But how exactly does a hard drive recovery service restore your data?
In this article, you will find an outline of the general process used by recovery engineers to restore your data from a failed hard drive. We will walk you through the step by step process of data recovery from submitting a case to getting your data returned to you.
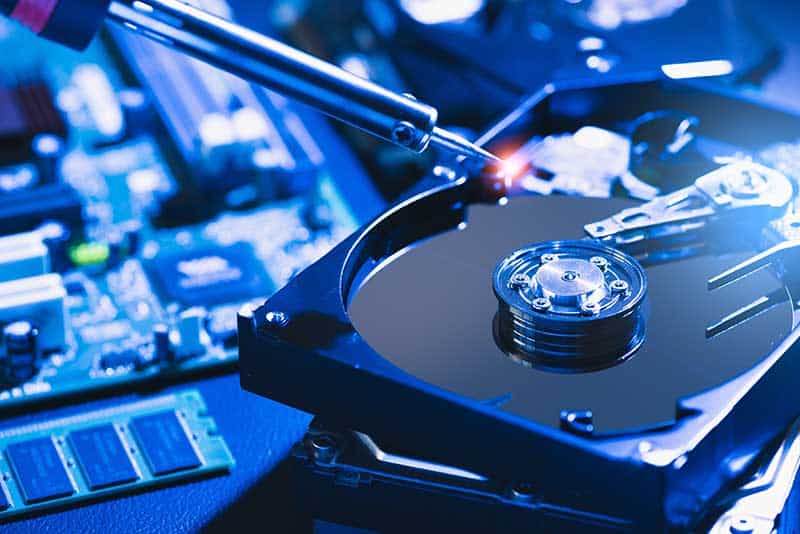
Our team of recovery engineers at Proven Data know the data recovery process inside and out, having successfully recovered data for thousands of clients since 2011. Our engineers can efficiently restore your data using the highest standards and practices in the data recovery industry.
We understand the complex process of hard drive recovery can leave you with questions. In this article, we will answer those questions by providing a transparent, easy to follow explanation of the process you can expect when working with a hard drive recovery service.
By the end of this article, you will:
- Know what to expect when you submit a case to a data recovery company
- Understand the general step by step process used by recovery engineers
- Learn how the evaluation and recovery processes factor into data recovery cost
How the hard drive data recovery process begins
If your hard drive starts to show signs of failure, it is essential to act quickly. The first attempt at data recovery is the most critical, as previous failed attempts can cause irreversible damage to your drive.
While it may be tempting to try your hand at do-it-yourself (DIY) data recovery, unfortunately, this often causes extensive stress to the drive, unraveling your chances of successful recovery.
We understand it’s a nerve-wracking situation when your hard drive fails and you’ve lost access to your data. Still, we encourage you to hang in there and seek a professional evaluation before making any recovery attempts. Don’t let a desperate attempt to recover your data cause unnecessary and irreversible damage.
It’s no surprise to hear a company that specializes in data recovery encouraging you to use a data recovery service. But at Proven Data, our client’s satisfaction comes before our bottom line. That’s why we offer a free hard drive evaluation to help you determine the extent and severity of your device’s failure (without paying a cent). This way, you can choose what the best option is for you to recover your data.
Signs of a failing hard drive could consist of clicking noises, grinding, slow performance, or inaccessible data. Below you will find the steps to take when your hard drive displays signs of failure:
1) Discontinue usage of device
First, you will be advised to discontinue all usage of the failing device to prevent further damage. This critical first step in the data recovery process can ensure you do not cause any irreversible damage that could reduce your chances for successful data recovery.
2) Submit a case to a hard drive data recovery company
When you submit a case to a data recovery company, you will fill out a case with information on your device’s issue.
When filling out a new case, be sure to include important information such as:
- The storage capacity of the hard drive, in gigabytes (GB)
- An estimation of how much data was stored on the hard drive, in gigabytes (GB)
- The circumstances of the failure (dropped, happened randomly, user error)
- The symptoms of the hard drive
- Any strange noises coming from the disk (clicking, beeping, grinding, buzzing, whirring)
- Provide detailed information about the most critical data (file names, folder paths, folder names, file extensions)
Providing accurate information on the circumstances preceding the initial signs of failure is critical for the recovery engineer to understand how to approach the recovery process and determine the likelihood of success.
Additionally, be sure to detail the specific data that needs top priority attention during the hard drive recovery process. Drives that are already damaged can quickly descend into complete failure due to the stress of the recovery process. Specifying what data is most critical for recovery will help guide the recovery engineer’s prioritize which data is most important and ensure the highest level of success in recovering your most critical data.
We understand it’s easy to request recovery of all the data on your failed drive. But chances are, in reality, you do not need all of the data on the drive (such as operating system folders and data).
Asking the recovery engineer to recover all data can jeopardize your chances of recovering the most critical data. When a drive is already failing, any additional processes used to restore potentially unnecessary data can stress the drive to the point of complete failure. Think critically about what data you need retrieved and be specific in your description.
Next, you will receive a response from a service representative, providing you with the next steps to begin the data recovery process.
3) Specify priority of the evaluation
There is an important distinction to make between the evaluation and the approved data recovery efforts.
The hard drive evaluation is where we perform diagnostics on your device to determine what methods, tools, and technology we need to restore your data successfully. This is required in order to understand your specific issue and provide you with a price.
The approved hard drive data recovery efforts are the actions taken when you have approved the quoted price after the evaluation has occurred.
For the evaluation, you will typically be offered a choice between standard and emergency evaluations. Selecting the evaluation speed determines what priority of evaluation service your case will receive.
Here is what the evaluation service level options typically provide:
- Free standard evaluation: The free evaluation is performed during standard business hours (M-F 9 AM – 6 PM EST). You are placed into our queue of other standard evaluation cases and an initial evaluation report can be presented within 1-3 days on average.
- Emergency evaluation: The emergency evaluation is performed around the clock 24/7 and is the fastest way to have your device diagnosed. You are able to jump the line of other standard evaluation cases and a report can be presented to you in as little as 4-6 hours on average (this emergency evaluation costs an additional non-refundable $400)
At any time during the evaluation and approved hard drive data recovery efforts, you can choose to elevate your recovery to emergency status, and a recovery engineer will work on your case with the immediacy you need.
Ship or drop off the hard drive for the evaluation
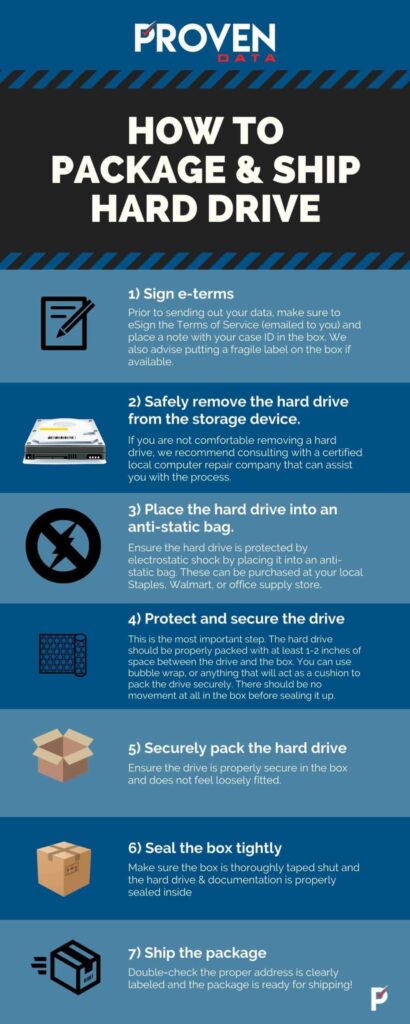
Next, you will be given instructions on dropping off or safely packaging and shipping your hard drive to your chosen service provider.
How the hard drive evaluation process works
Before starting the initial evaluation, the data recovery engineer will review all documentation provided by you about how or why you suspect the drive started showing signs of failure. If any additional information is needed from you, you will be contacted for further clarification.
The evaluation procedure is meant to be non-invasive, meaning that very little or no additional damage should occur as a result of the evaluation procedures.
1) Connect the hard drive to diagnostics and imaging tools
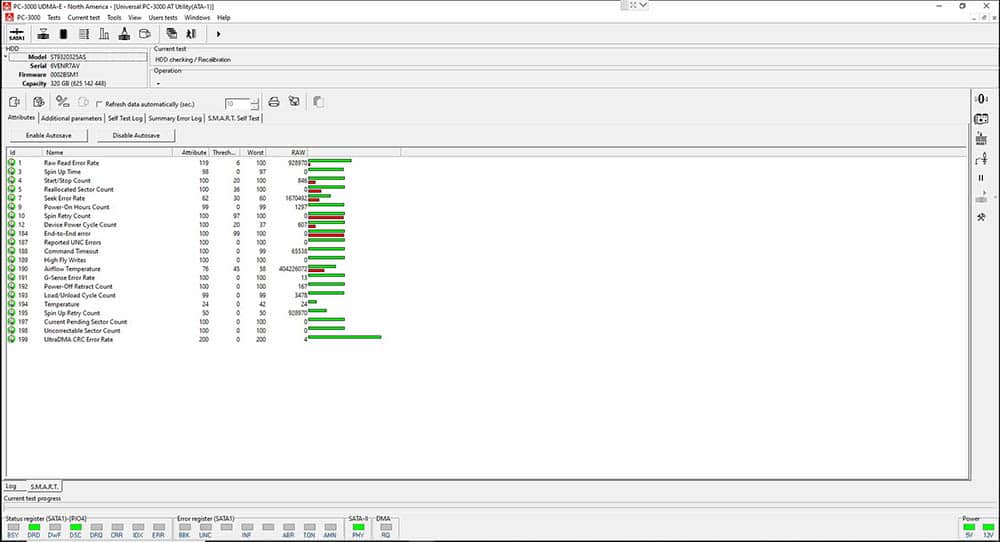
Two common tools to accomplish this are the Deepspar Disk Imager (DDI) and the PC3000 (PC3K). These tools are used to perform diagnostics and imaging of hard drives that have failures or instabilities.
2) Run diagnostics tests
The initial diagnosis of your hard drive will check for the following:
- SMART errors: The drive health can be checked with a SMART test (Self-Monitoring, Analysis and Reporting Technology). It is important to note that the SMART test does not always indicate signs of a failure.
- Electronic failure: Determine if the hard drive has experienced an electronics issue, usually with the printed circuit board (PCB).
- Bad sectors: Determine if there is logical sector damage contributing to bad sectors.
This initial status report on the drive’s health can provide insight into what steps are needed to recover your data.
3) Build a head map
If the initial diagnostics tests pass, the next step is to build a head map. You do not want to build the head map if the other steps have failed; this could cause further damage.
By building a head map, a recovery engineer can detect the severity of damage on the read/write heads of the hard drive. These components are responsible for the reading and writing of data to the hard drive.
Understanding the condition of the heads will determine if the hard drive is stable enough for the imaging process. If the damage is too severe, the hard drive will need to be rebuilt mechanically so that the mechanical components are functioning properly.
3) Determine estimated cost of recovery
The initial free evaluation provides enough information to present you with a cost estimate for proceeding with the hard drive recovery service. It is impossible to give an exact price for the case due to the recovery process’s evolving nature. More damage is often revealed as the hard drive recovery process progresses and the recovery engineer navigates this damage accordingly.
4) Decide to proceed with recovery or not
When the initial evaluation is complete, you will receive an email with a diagnostic report detailing the evaluation’s findings and the estimated hard drive data recovery cost. A data recovery engineer will be available to answer any questions you have while you review this initial summary of your case.
The consultation and evaluation process enables you to make an informed decision about data recovery. If you decide to proceed with the hard drive data recovery service offered, the data recovery process begins upon receiving a signed copy of the terms of service agreement.
If you decline to proceed with the recovery service, you will not be charged anything other than the shipping costs to return your device to you.
How the approved data recovery service works
If you have decided to move forward with the data recovery efforts, this section outlines what you can expect.
Data recovery engineers perform hard drive data recovery by utilizing various professional tools.
If necessary for severe mechanical failures where internal rebuilding is required,your device can be sent to a secured clean room facility to ensure it is opened in a controlled environment free of airborne dust particles or other contaminants.
A reputable hard drive recovery service company will staff engineers who have gone through rigorous background checks and participate in continuous training. This training ensures recovery engineers are up to date on the latest data-storage and recovery techniques and technologies.
1) Image and rebuild the hard drive
If the hard drive passes diagnostics tests and is stable enough to attempt imaging, the next step is to image the drive. However, if the hard drive shows signs of significant mechanical problems it will need to be taken apart, rebuilt, and stabilized before attempting to create an image.
If the hard drive has internal mechanical problems, it will need to be opened and taken apart in a clean room environment. Using spare parts from an identical hard drive usually matched within 1-2 months of the manufacturer’s date, the hard drive’s faulty parts are replaced. The hard drive is then stabilized and the imaging process can commence.
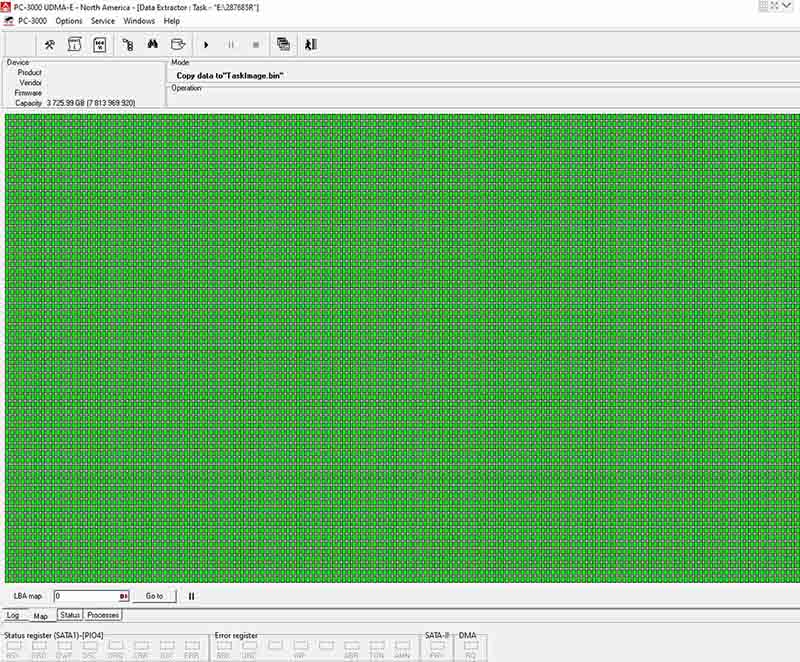
Creating the image is one of the most important parts of the data recovery process. The success of the image determines whether any data can be extracted.
If the hard drive is stable enough to create a folder directory, selective imaging can be performed. Essentially, this means that instead of imaging every sector of the hard drive, individual folders or files can be imaged. This is very beneficial since you can recover the most important folders or files first.
If only a partial image can be created, then only some of the data will be recoverable. Partial images are usually caused by surface damage on the platters, which is where your data is stored internally. Think of the platters like a CD that we used to play. Remember when they had scratches and would skip or not play? That is the same concept that occurs when platters are damaged.
If no image can be created at all due to extensive internal damage on the platters, unfortunately, no data can be extracted.
The imaging process is approached very carefully. If the hard drive displays signs of instability, then certain configuration settings of the imaging can be adjusted. These include read/write speed, block size, and types of reads.
Making the right configuration changes to an unstable hard drive can determine whether the recovery will be successful.
While imaging the hard drive, it is also important to monitor the imaging. At any point, the drive can become unstable and stop imaging. To avoid further damage, adjustments need to be made if the drive becomes unstable.
2) Trace and rebuild the data tree
Attempting to rebuild the hard drive’s data tree allows the recovery engineer to discover the files and folders that are visible.
If there are sectors that could not be imaged within critical parts of the hard drive, some of the data tree may be missing or incomplete.
3) Extract and transfer data from the image of drive
At this point, the recovery engineer will double-check what data you designated as most critical. They will then select the specified critical data, extract it from the data tree and transfer the data to the new external hard drive.
You will also need to select whether you want the external hard drive you are receiving formatted for windows (NTFS) or macintosh (HFS+).
The time needed for data transfer varies from case to case, depending on the amount of data and file sizes, but you’ll receive a notification once the transfer is in progress.
4) Send file list for your review
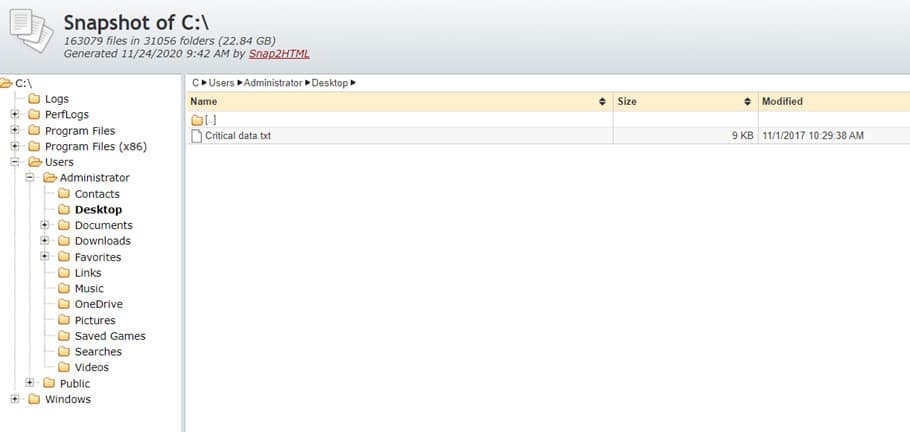
Once the drive’s data has successfully transferred onto the new external hard drive, a file list will be generated and sent to you. The file list is a read-only, interactive folder and file tree of your recovered data.
This allows you to verify all of the recovered data to ensure the hard drive recovery service has met your expectations.
If there is missing data that you expected to see, the recovery company can take another look and investigate whether it can be retrieved.
Once you confirm the data recovery is satisfactory, you will receive an invoice for the final cost of the data recovery and you can schedule a pick-up or have your data shipped back to you.
5) Return your data to you
When you receive your recovered data on the new external hard drive, we recommend creating a backup copy and taking one more look at the recovered contents.
The original disk will not be usable again and typically, the data recovery company can securely environmentally dispose of it for you for no charge.
You do not want to throw your hard drive in the garbage as someone can still try to recover your data themselves.
It’s important to note that a data recovery service does not repair your hard drive to be used again in the future. The hard drive is repaired only for imaging purposes and will never be reliable for normal use again.

What’s next? Learn about data recovery cost
Now that you know what to expect from the data recovery process, what factors influence the cost of hard drive data recovery?
We’ve outlined the general cost of data recovery services to answer any questions you might have when considering using a hard drive data recovery service to restore your files.
The hard drive recovery engineers at Proven Data are standing by 24/7 to answer your questions and provide the expertise you need to navigate the data recovery process.
Need hard drive data recovery?
Talk to one of our data recovery experts today
Open a case


